How to Create Virtual Machines in Arcfra (From Scratch & Template)
🚀 Daily Operations in Arcfra: Creating VMs with Ease
In a typical enterprise environment, provisioning virtual machines (VMs) is a daily activity — whether for developers, testing environments, or production workloads. With Arcfra Enterprise Cloud Platform, the process is streamlined and efficient, offering two powerful methods to create VMs:
- Creating a VM from scratch
- Cloning a VM from a predefined template
This article walks through both workflows using Arcfra’s intuitive web-based interface.
🧱 1. Creating a VM from Scratch
Creating a VM from scratch is ideal when you need full control over the configuration — from selecting the operating system to customizing compute and storage resources.
🔹 Steps:
- Login to the Arcfra dashboard.
- Navigate to Cluster → Your Cluster.
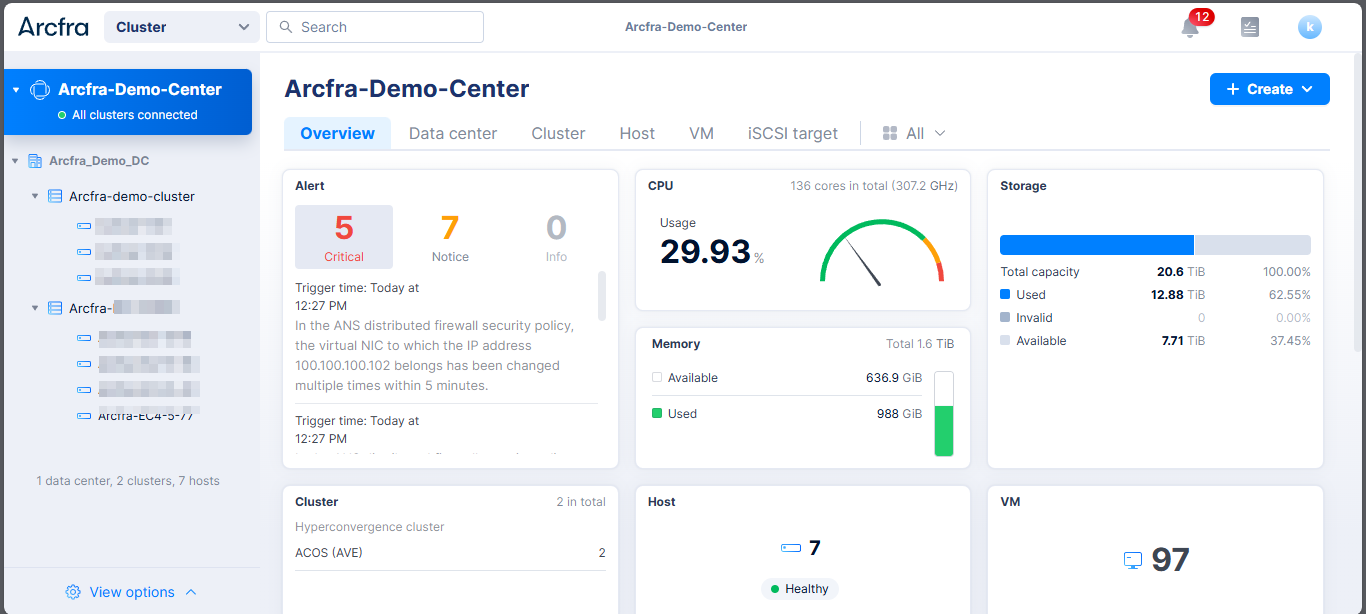
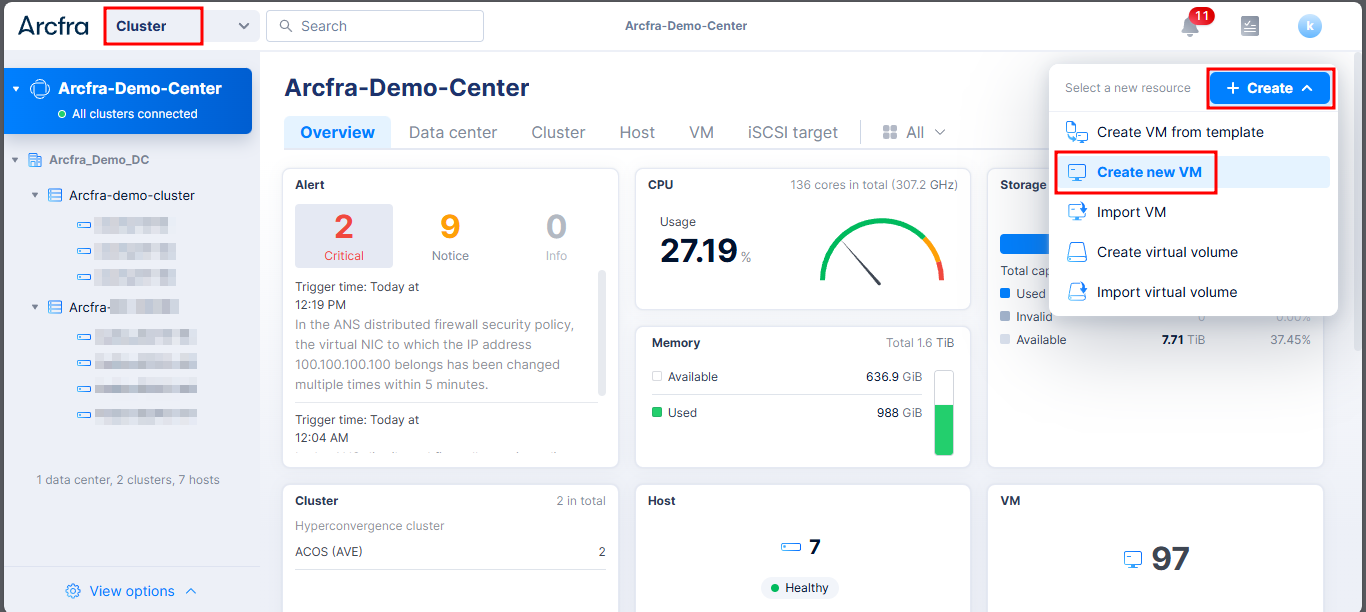
- Click Create → Create New VM.
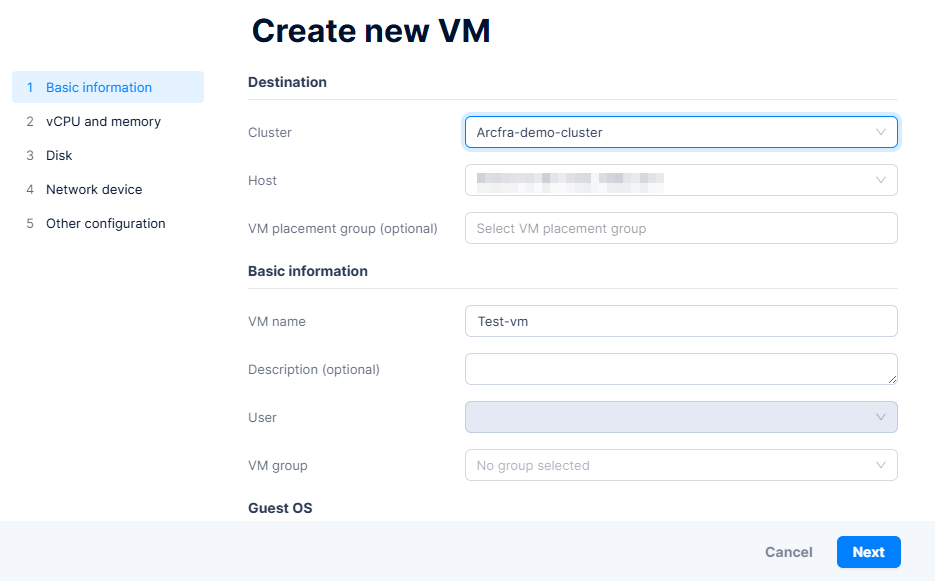
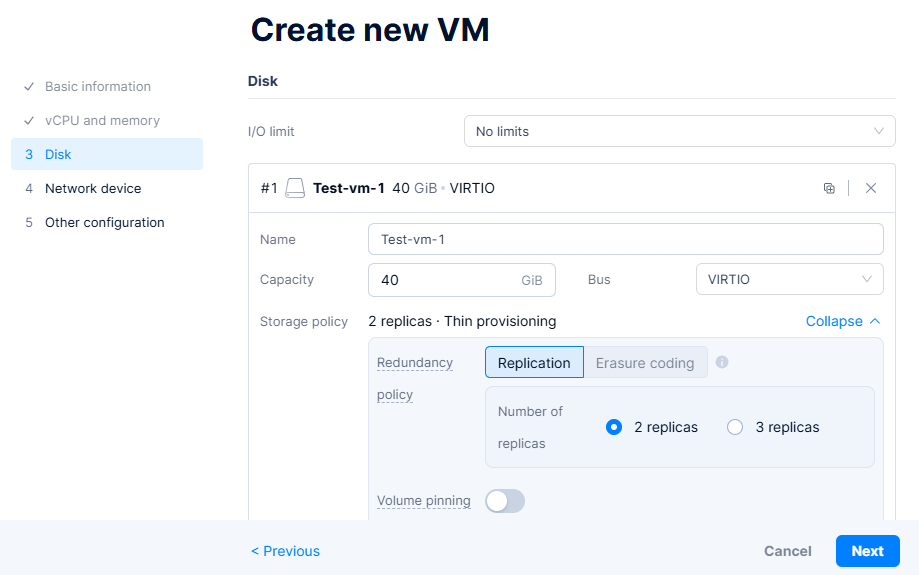
- Fill in the VM details:
- VM Name
- Cluster and Host
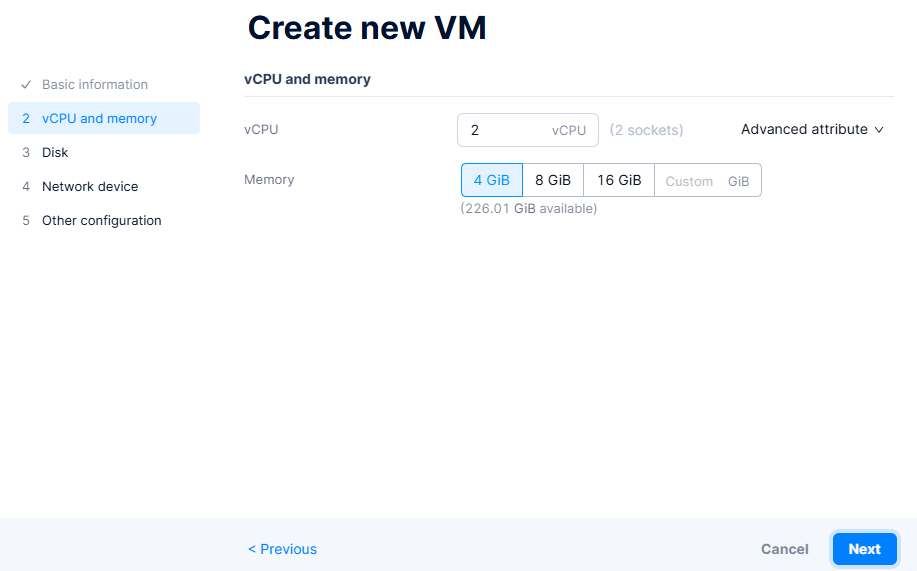
- CPU & Memory allocation
- Storage size and type (thin or thick provisioning)
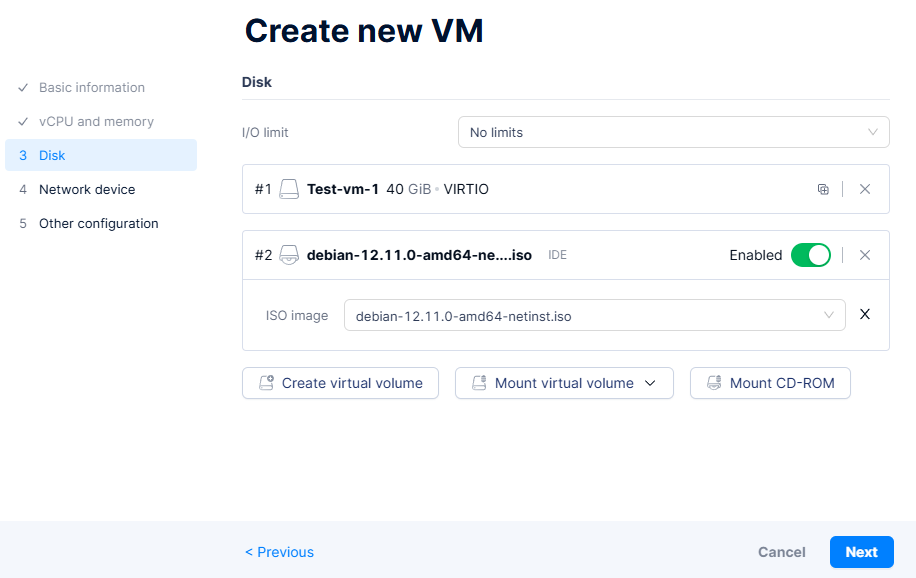
- Attach an ISO image or installation media:
- Upload your ISO to the image library if not already available.
- Upload your ISO to the image library if not already available.
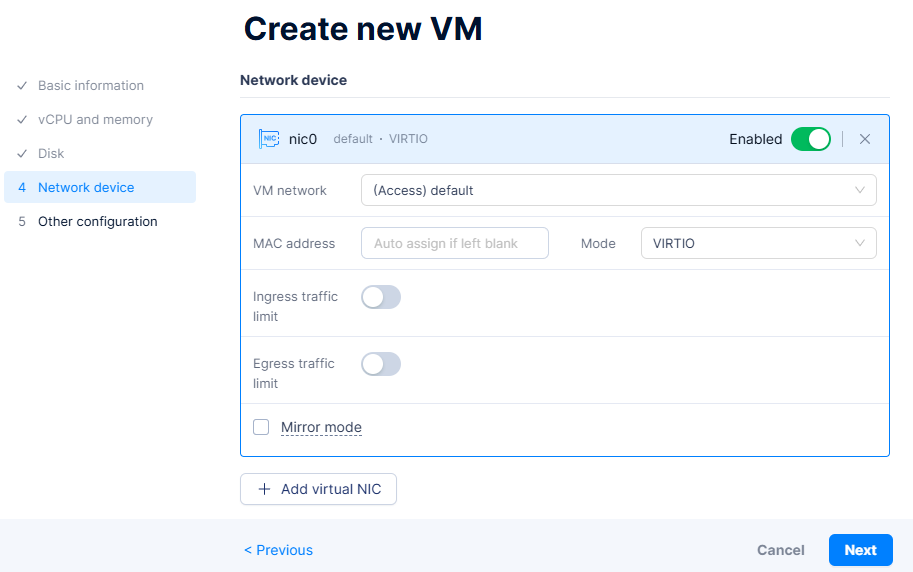
- Configure network interface:
- Attach to a predefined virtual network (VLAN/VXLAN).
- Attach to a predefined virtual network (VLAN/VXLAN).
- Optionally configure:
- Boot options
- High Availability
- Autostart Options
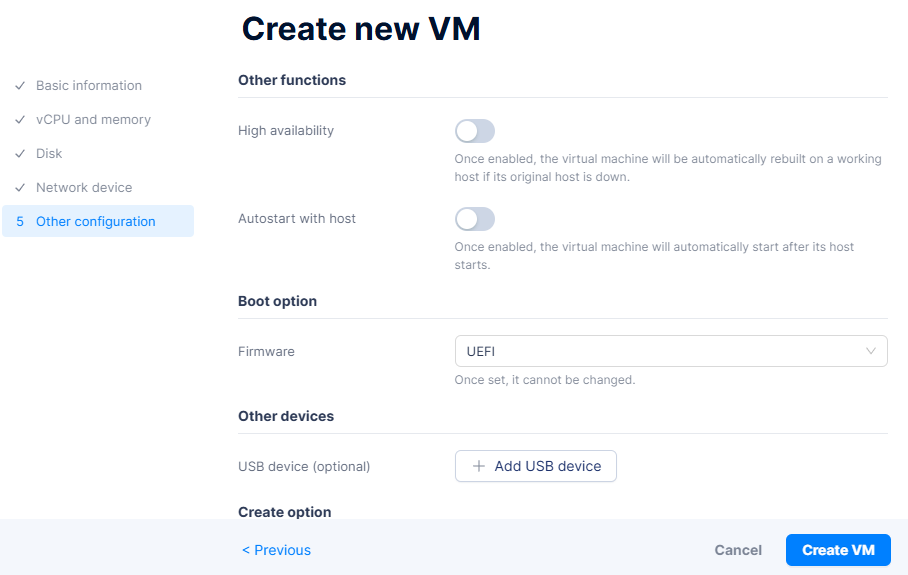
- Click Create to provision the VM, then boot it to begin the OS installation from the ISO.
💡 Tip: Use snapshots during installation stages so you can roll back if needed.
📦 2. Creating a VM Using a Template
When speed and consistency matter — for example, when provisioning identical Linux or Windows VMs — using a template is the way to go.
🔹 Steps:
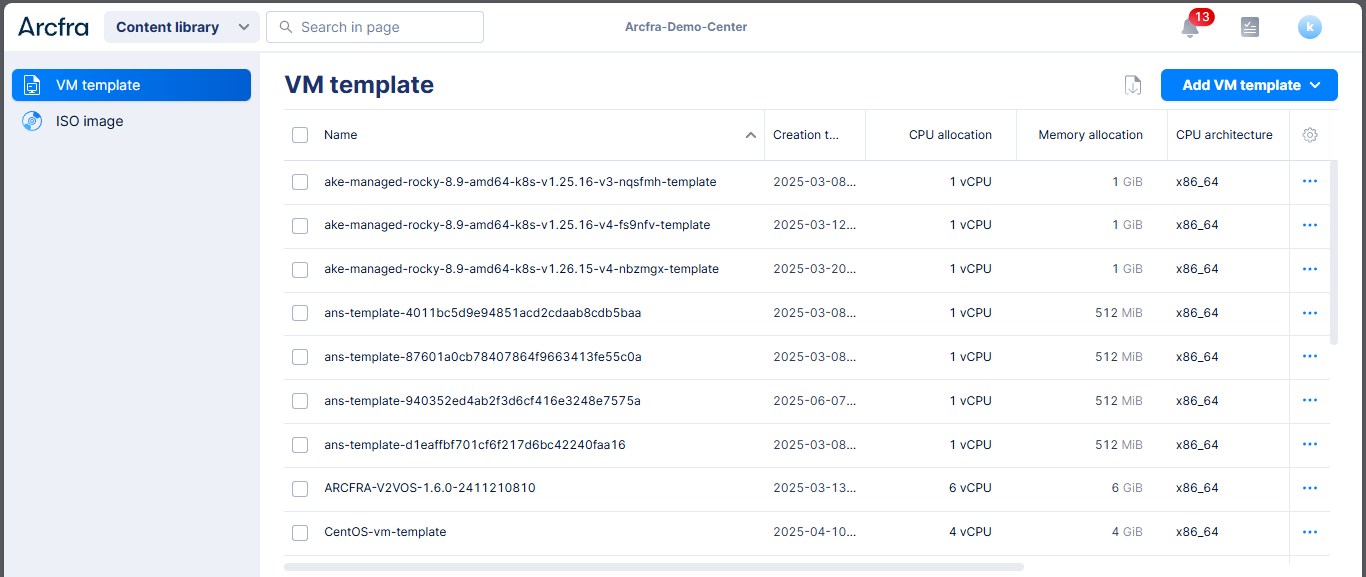
- Navigate to Content Library → VM Templates.
- Ensure a base VM template exists (created manually or via cloning an existing VM).
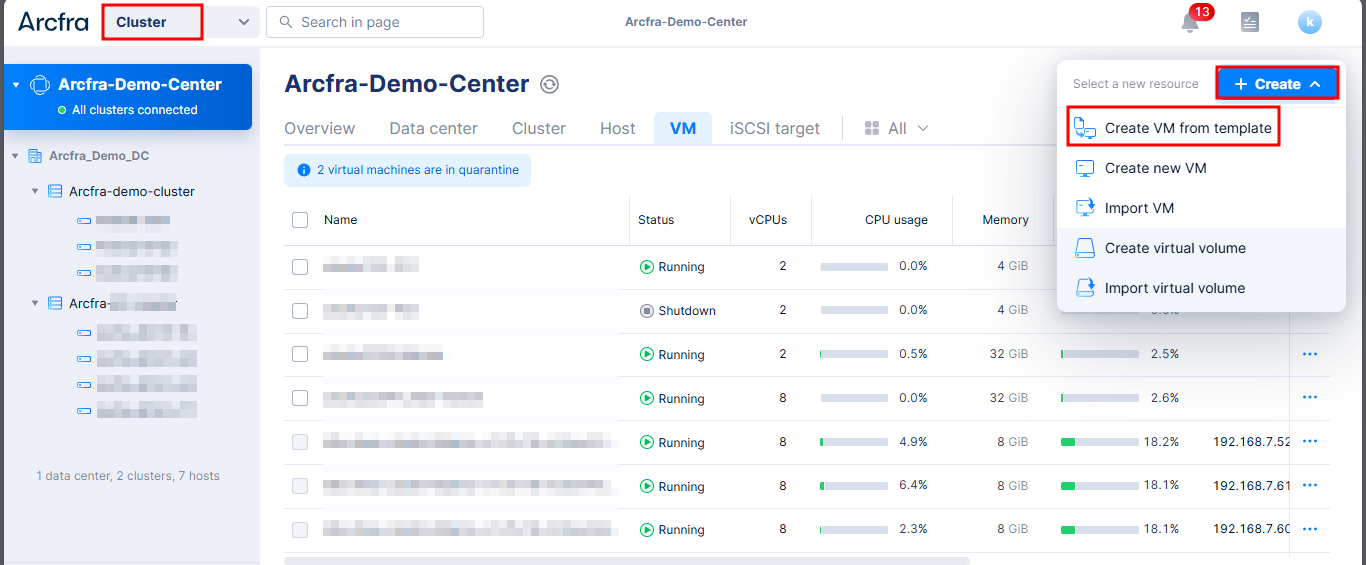
- Go to Cluster → VM → Create VM.
- Choose “From Template” and select your desired template.
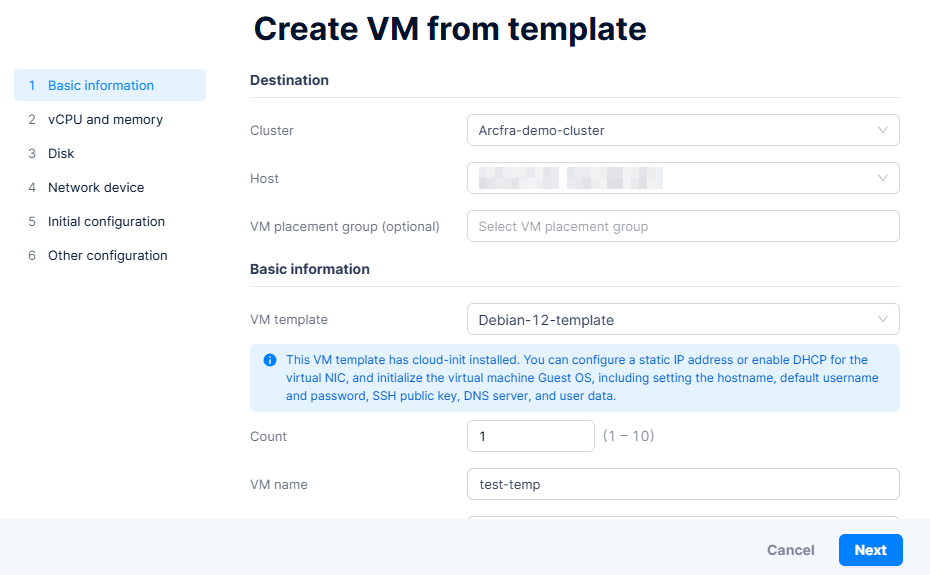
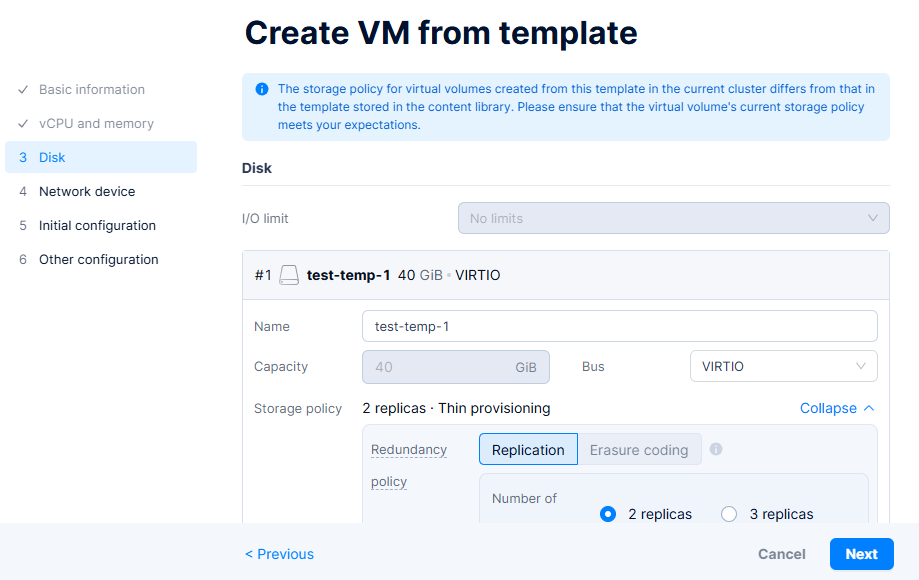
- Customize:
- Basic Cluster and Host Info
- VM Name
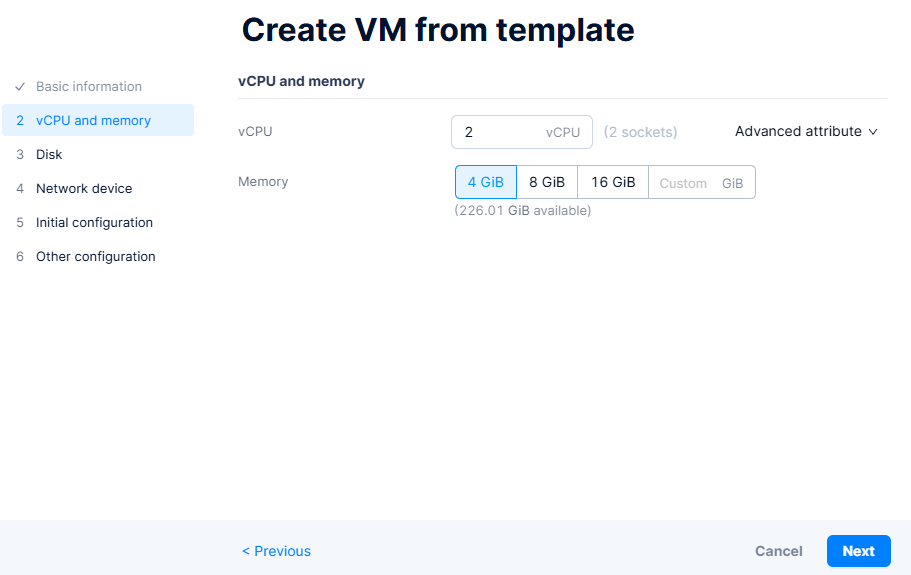
- Resource allocation (CPU, RAM, disk override)
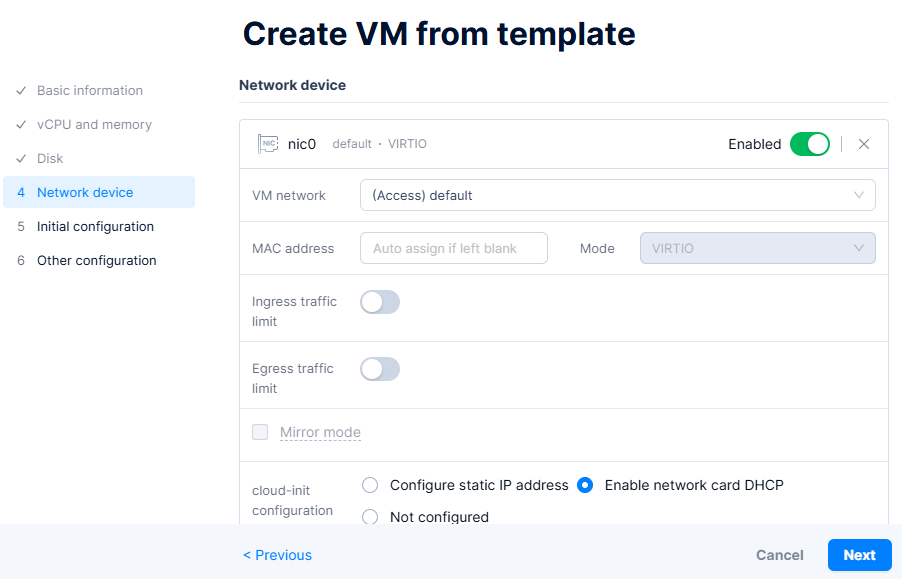
- Network settings (VLAN, DHCP/Static, etc)
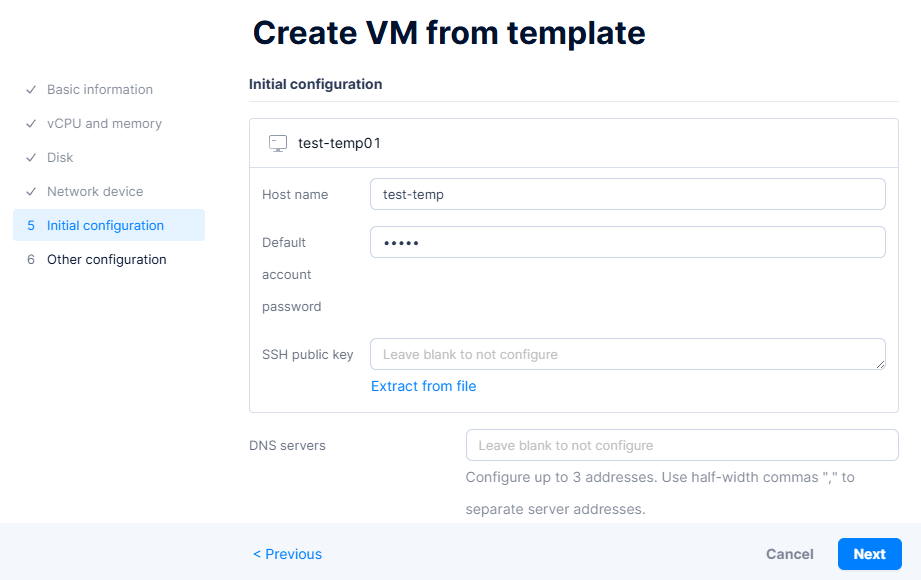
- Optionally:
- Inject SSH key
- Enable cloud-init for hostname/password
- DNS Server
- User data
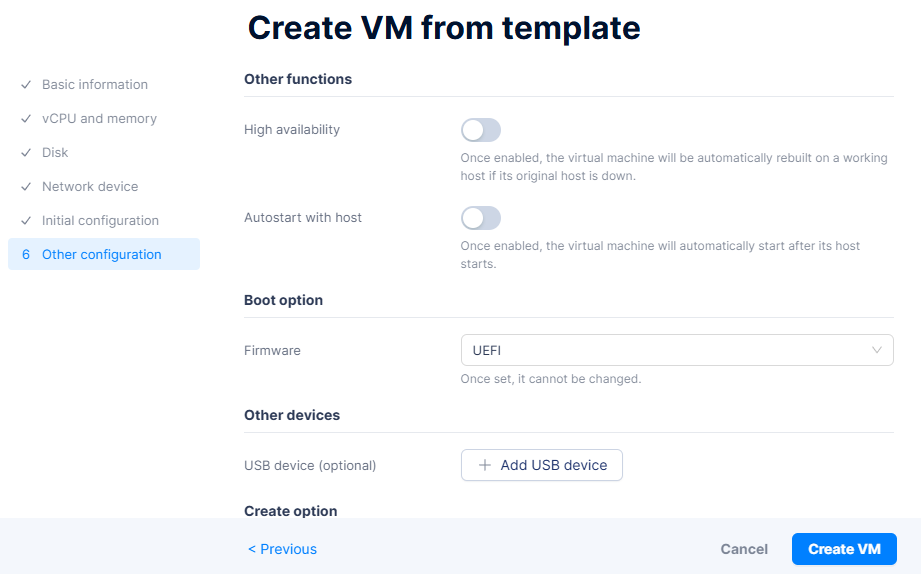
- Click Create VM — the VM will be provisioned with OS and software pre-installed.
🔁 Templates reduce provisioning time and ensure every VM follows your organization’s baseline image policy.
⚠️ Make sure the template is generalized (e.g., via
cloud-initorcloudbase-init) to avoid hostname or IP conflicts.
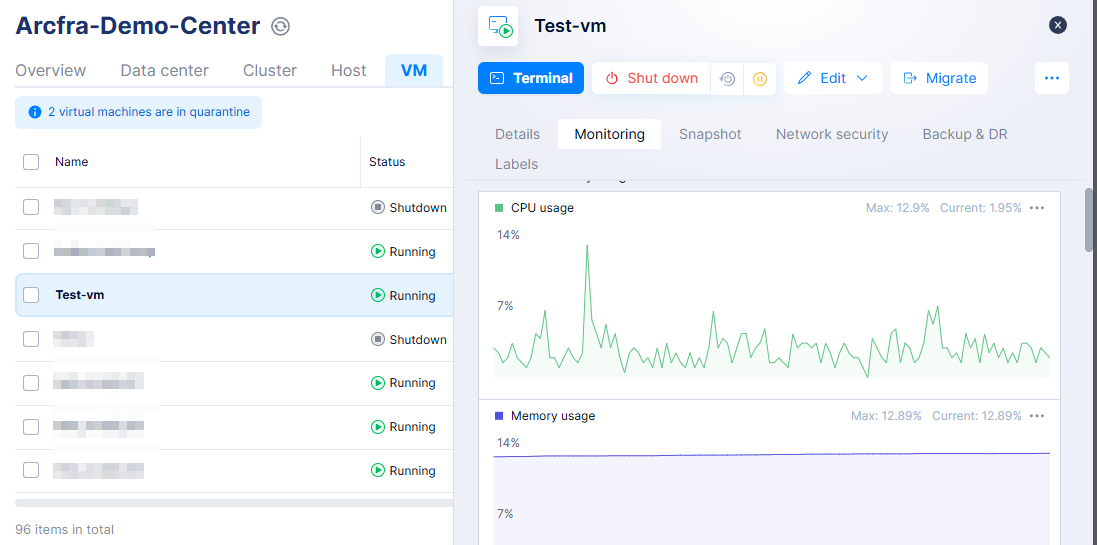
📊 Real-Time Monitoring & Management
After deployment, Arcfra offers built-in monitoring for CPU, RAM, disk, and network usage. You can:
- View VM performance graphs
- Resize resources on the fly (hot-add)
- Perform live migration across nodes

✅ Final Thoughts
Arcfra simplifies VM creation through both customizable and standardized workflows. Whether you’re building from scratch for fine-tuned control, or deploying from templates to save time and maintain consistency, Arcfra supports both with a clean UI and robust backend.
Stay tuned for the next article where we’ll cover upgrade and downgrading CPU / Memory in Arcfra.
📧 Have questions or want a demo? Contact: [email protected]
🌐 Learn more: https://kreasismart.id/enterprise-cloud-platform
✨ Have feedback or questions about this guide? Let us know — we’re happy to help!